Building a solar micro-grid in my bedroom with parts from Amazon
The problem
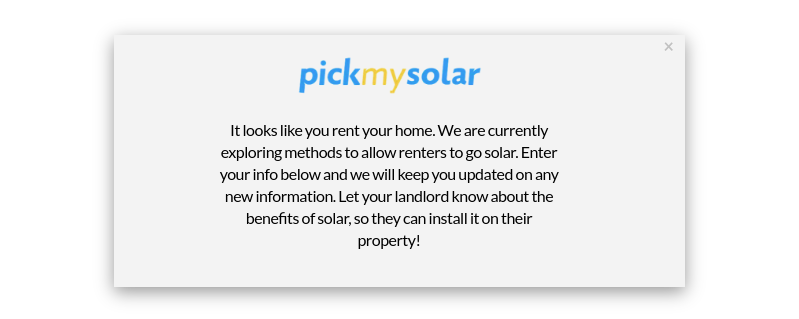
Apartment renters need the landlord’s permission to install anything on their rooftops. This makes installing solar difficult for people who rent. Because most of the world lives in urbanized areas where renting is common, I think this is a problem standing in the way of solar adoption.
An additional speed bump is the complexity of installing solar: regulation around net-metering. Grid-tied systems. Installation permits (even if you do own your property). Getting quotes from different installers. Solar financing. All complex processes inherited from the construction industry which slow down mass private adoption of renewables.
In the following I attempt to bypass both these problems by building a standalone solar power plant on my windowsill with off-the-shelf Amazon parts, and discuss the pros and cons of this approach to solar.
A possible solution
A windowsill solar system bought off Amazon solves both problems at once: Renters don’t need permission from their landlords to place things on their windowsill and rooftops if it’s not altering the building, and it’s a one-click Amazon purchase with no regulation as long as it’s not tied to the grid (which mine is designed not to be). Two birds with one stone. This makes the solar buying process more like buying a consumer electronic.
Questions remain. Can this system make any meaningful energy? Does it make financial sense?
How-To Guide
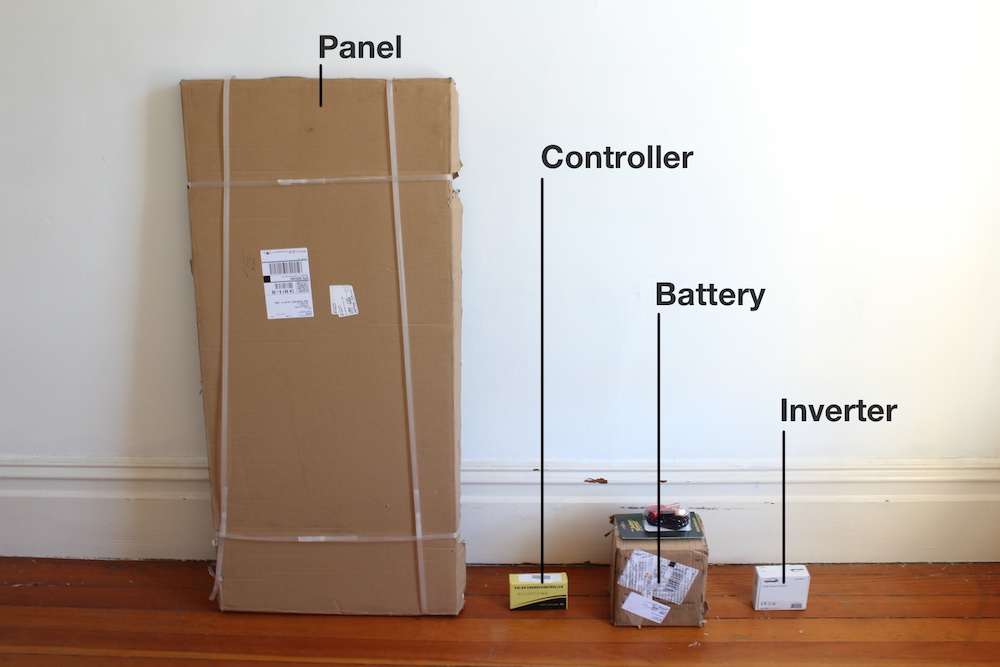
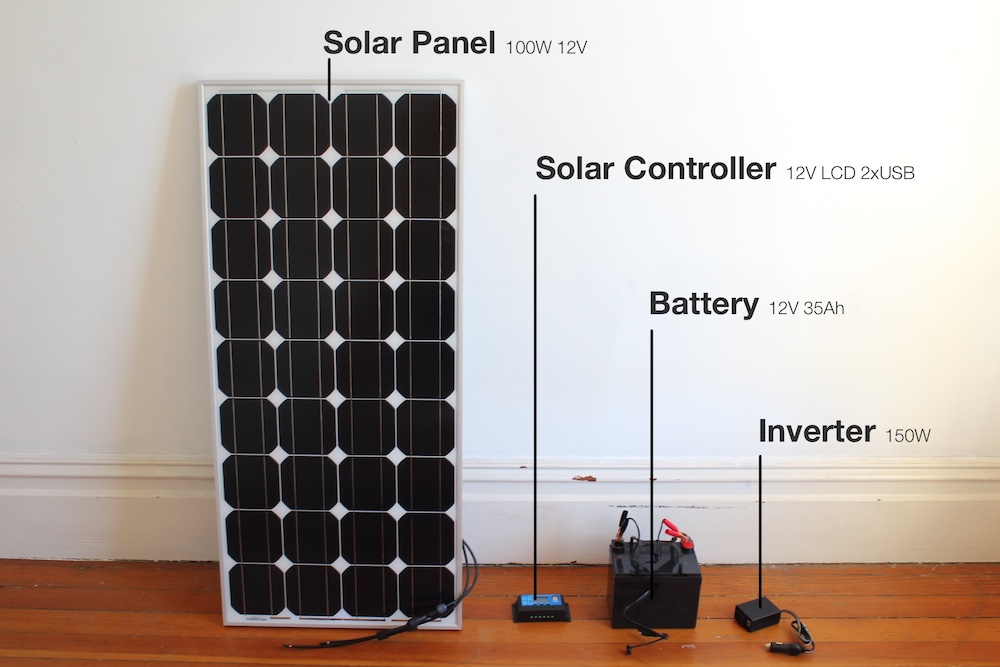
My goal is to take care of the energy needs for just my bedroom. 4 main components are all we need to achieve this: A solar panel to collect, a battery to store, an inverter to convert the direct current to alternating current, and a “charge controller” to balance the three other components.
The Kit (updated Nov 2020)
We’ve updated this kit below. Three main changes have happened in the 3 years since this was written:
- We’ve upgraded the inverter from a 100W to a 150W.
- We’ve upgraded the battery from a 420Wh Deep Cycle Lead-Acid battery (about 100Wh usable capacity) to a 192Wh LiFePO (Lithium Iron Phosphate) battery (192Wh usable capacity, or double the lead-acid) as the lithium batteries are coming down in price faster than lead acid batteries are. We were unsure on whether to update these three changes into this original article or write a whole new one, but decided to update the original as this is the one that most people will find on search.
- Prices are down (despite the above two upgrades!) from the original $211 to $201.
Parts Cost on Amazon: $201
Solar Panel

Cable

Solar Controller (Renogy Wanderer)

Cable 2

Lead-Acid Lithium Iron Phosphate Deep Cycle Battery

100W 150W Inverter

I’m using bargain-basement parts intended for RV, marine & car usage which keeps my system cheap and mobile. The main components as found on Amazon are above.
 |
 |
|---|---|
I ordered the system on July 2nd, and with ground shipping the PV panel arrived July 11th from Canada, and the battery, wiring, controller and inverter arrived July 15th from Amazon USA.
Assembly
Hopefully you can adapt my system to your spatial situation pretty easily:
 |
 |
|---|---|
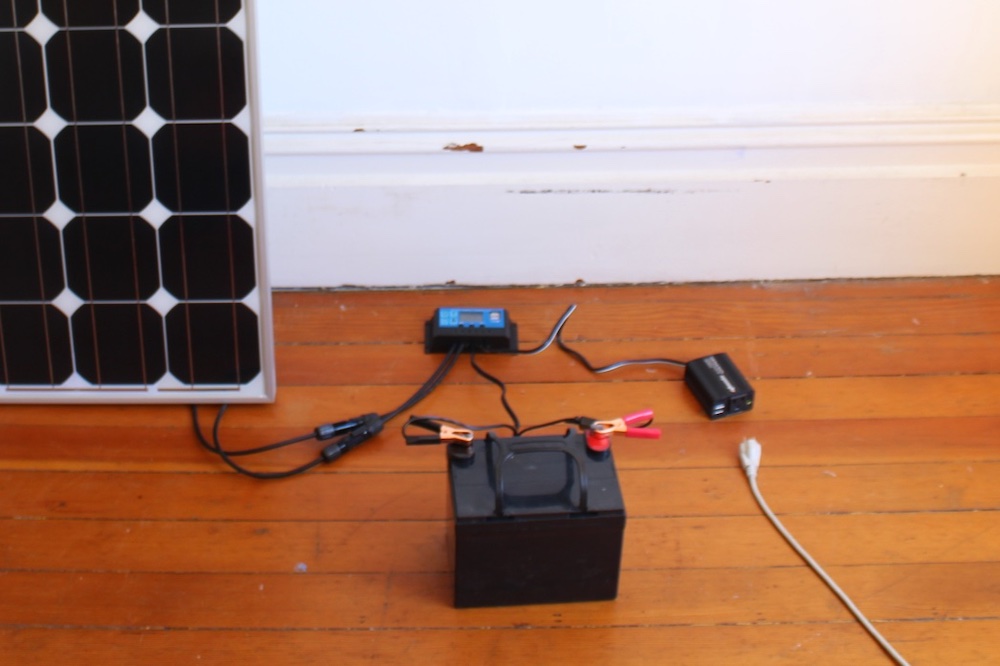
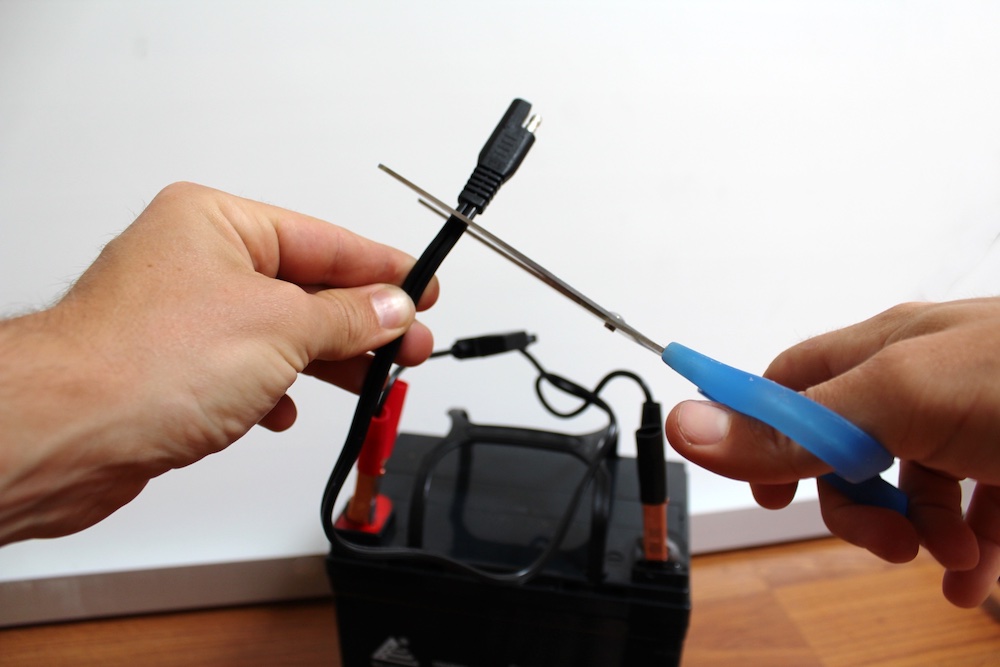
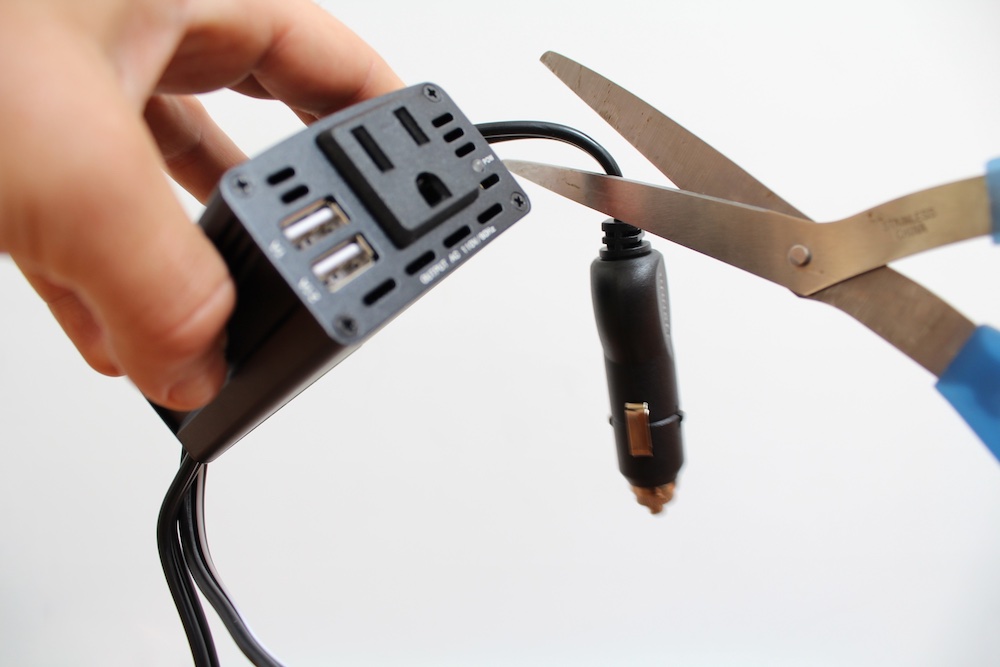
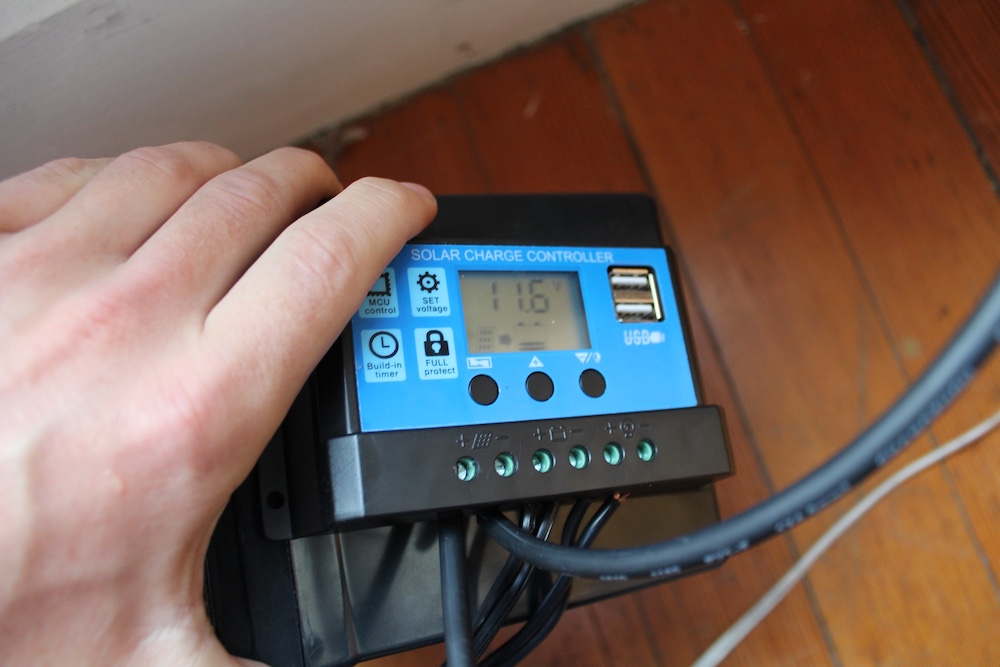
Step 1 Cut and lay bare the end of the battery & inverter wires (battery disconnected, please). The panel’s wires are already bare on one end. Do a dry run connecting battery, inverter and panel to the controller — it should look like above. The striped wire of the inverter cable is the positive, the unmarked is negative FYI.
 |
 |
|---|---|
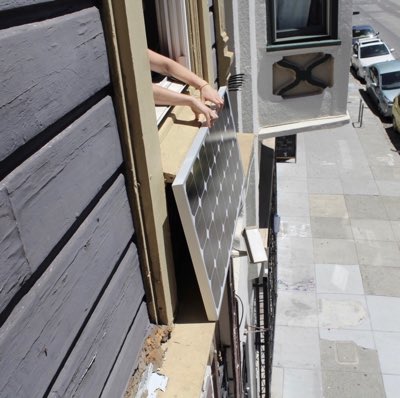
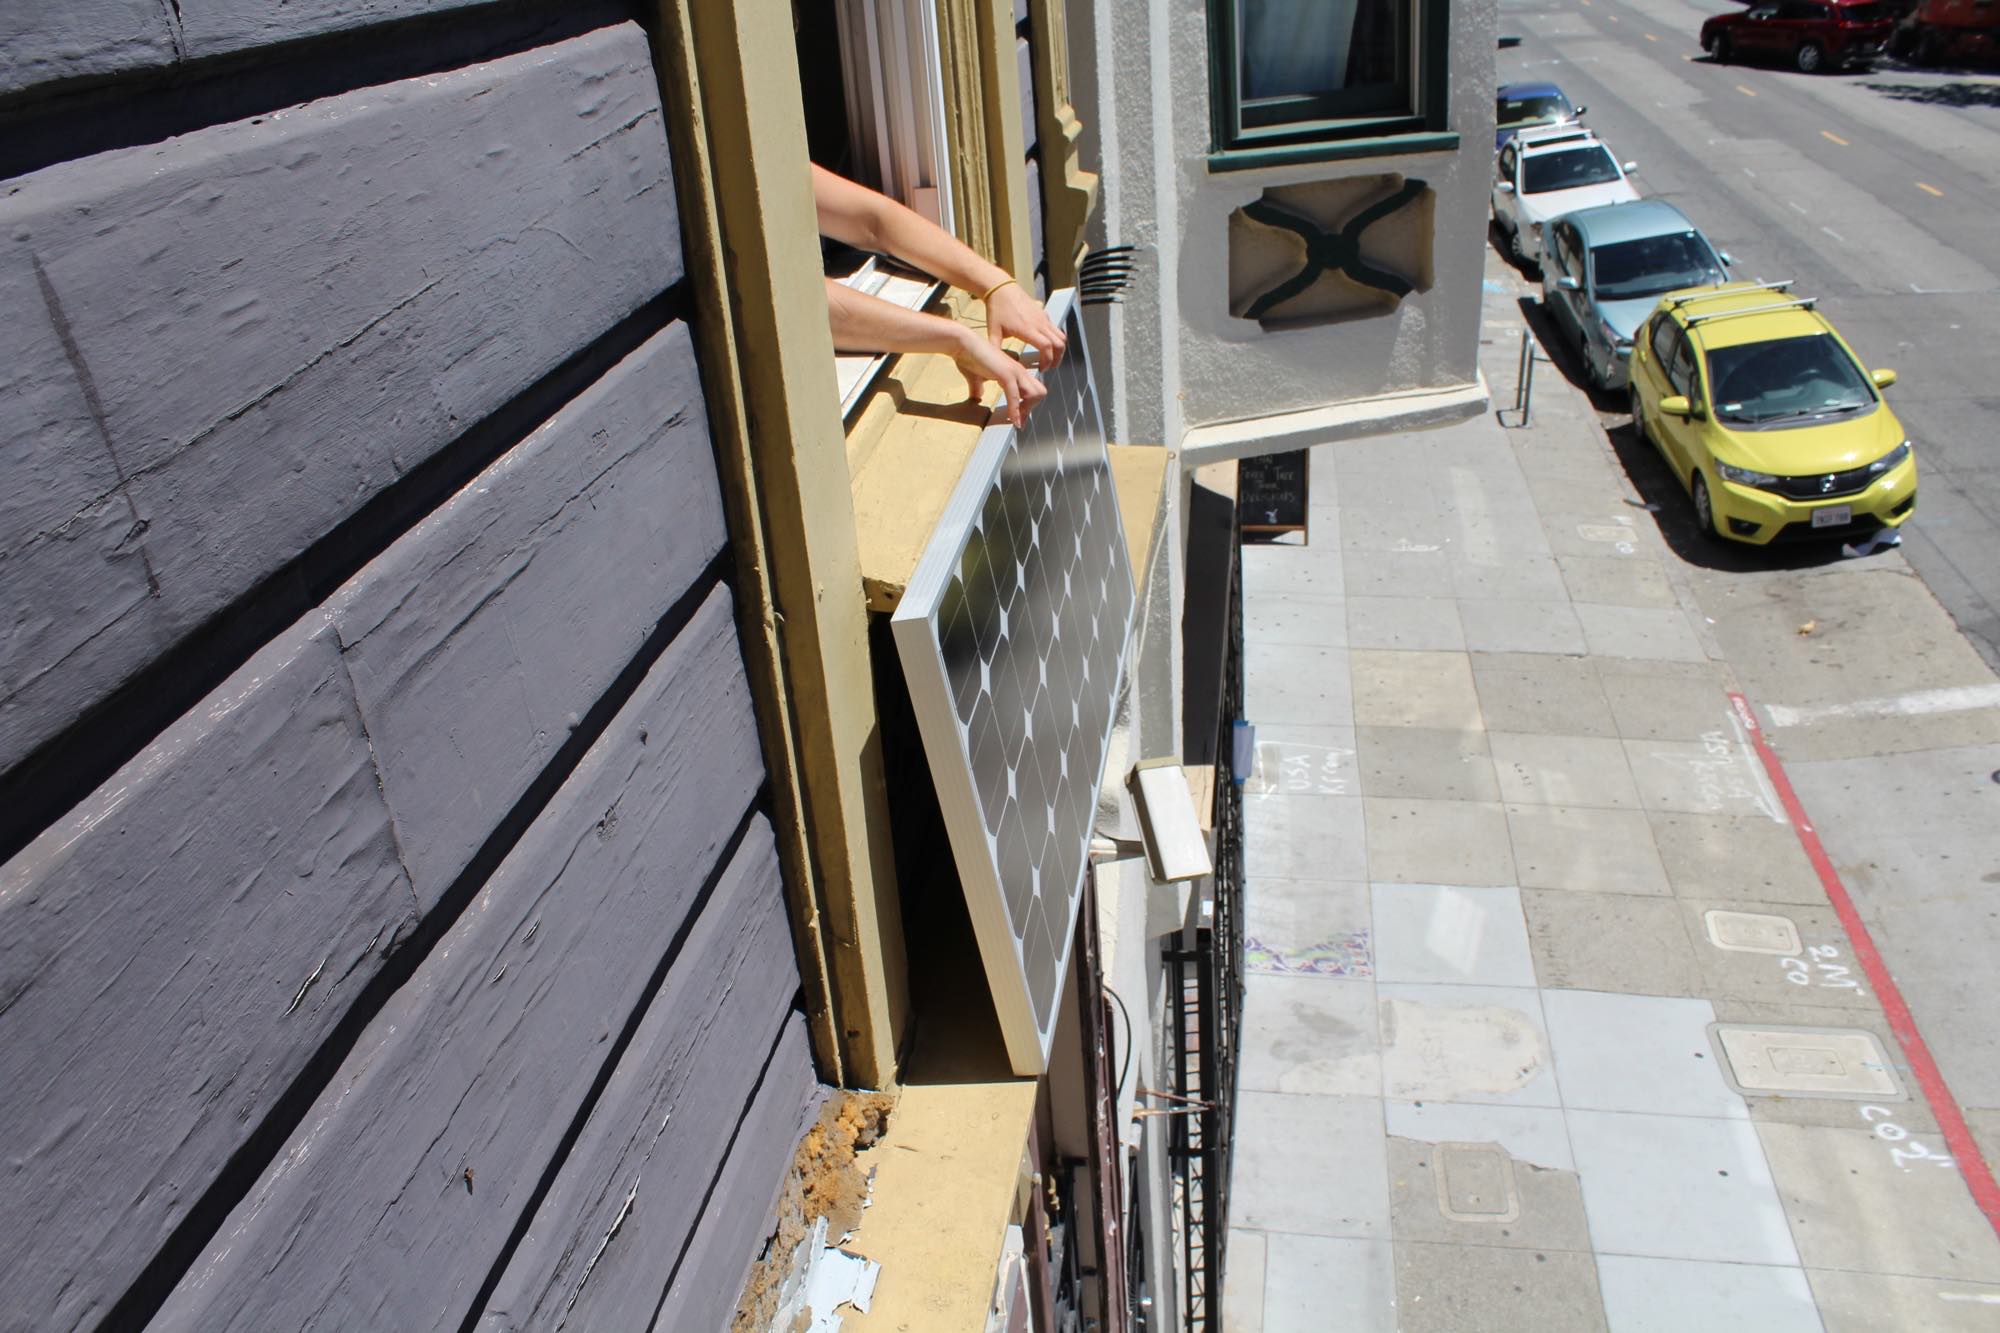
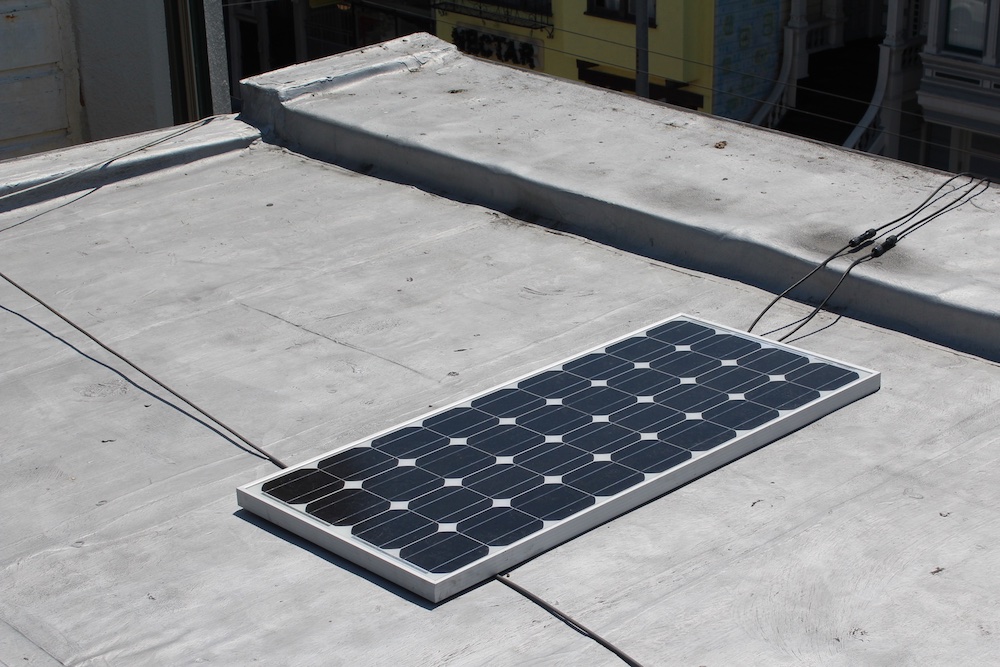
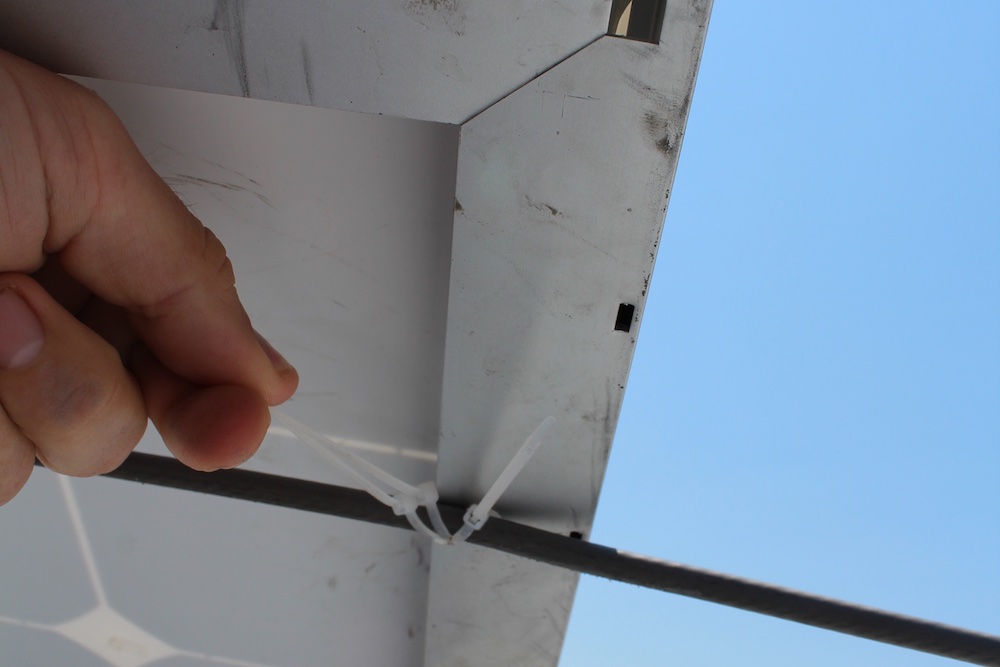
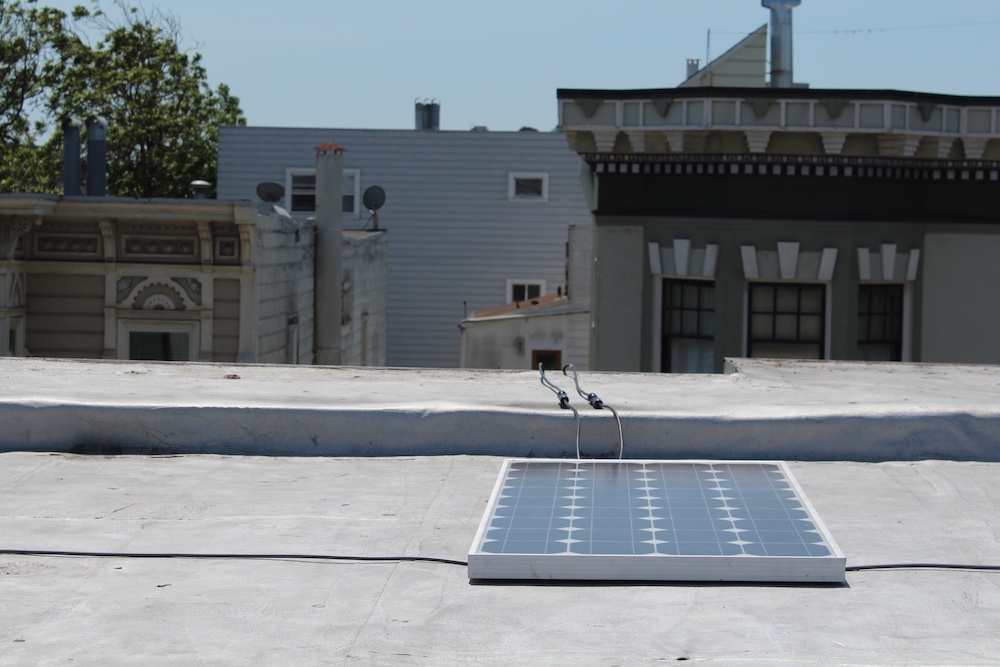
Step 2 Detach the panel wires again and place the panel on the rooftop or wherever you get the most sunlight (…garden …balcony …). Attach the panel to something: I zip-tied the back of the panel to a cable which I fastened on both ends around sturdy roof pipes…
 |
 |
|---|---|
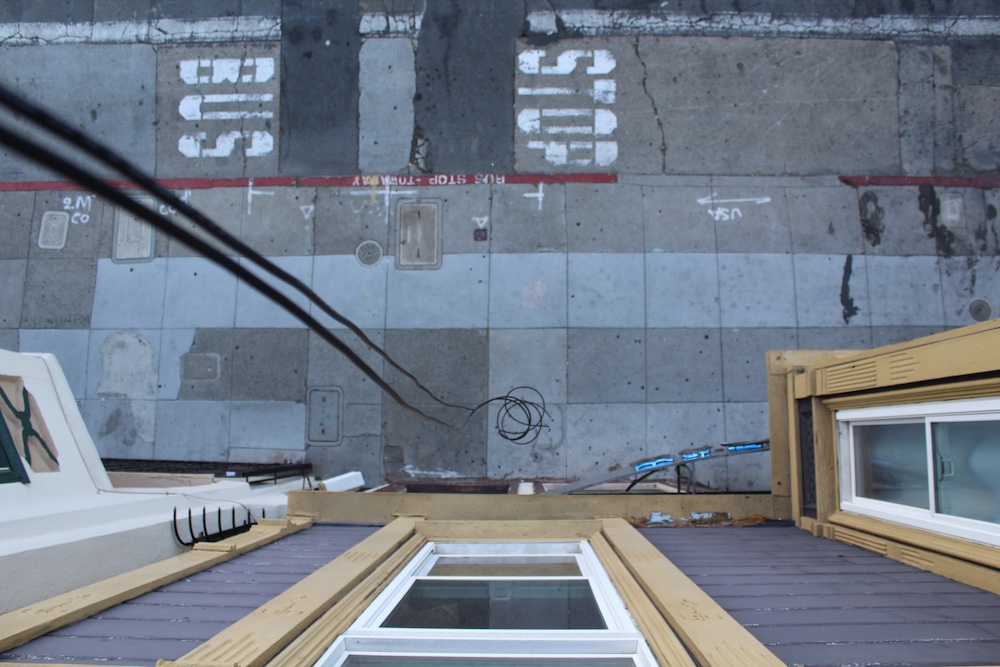
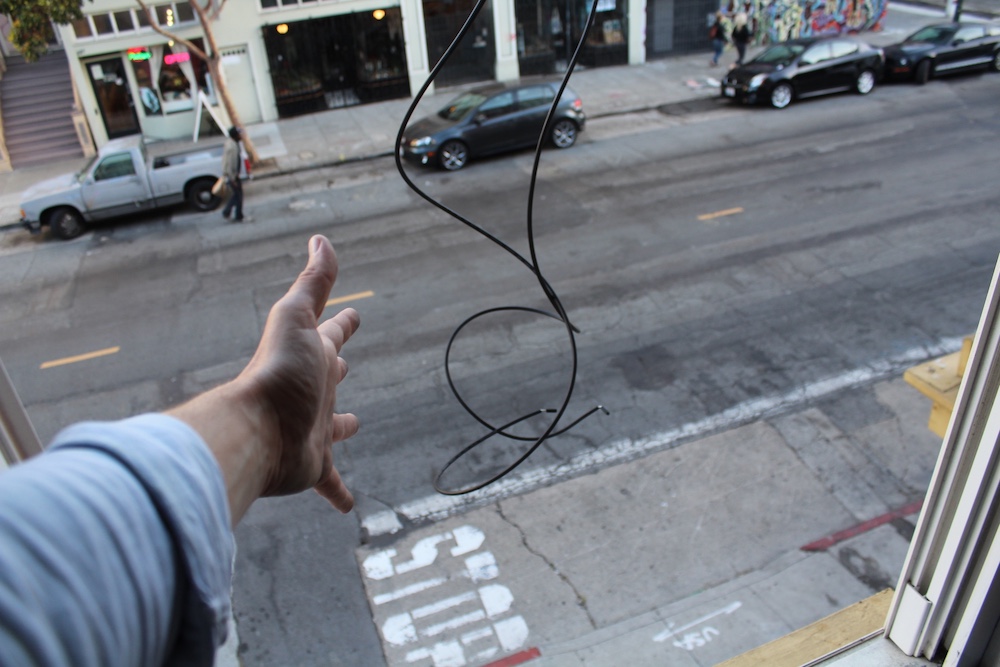
…and run the power lines back to your apartment (drop down the facade and into the window in my case).

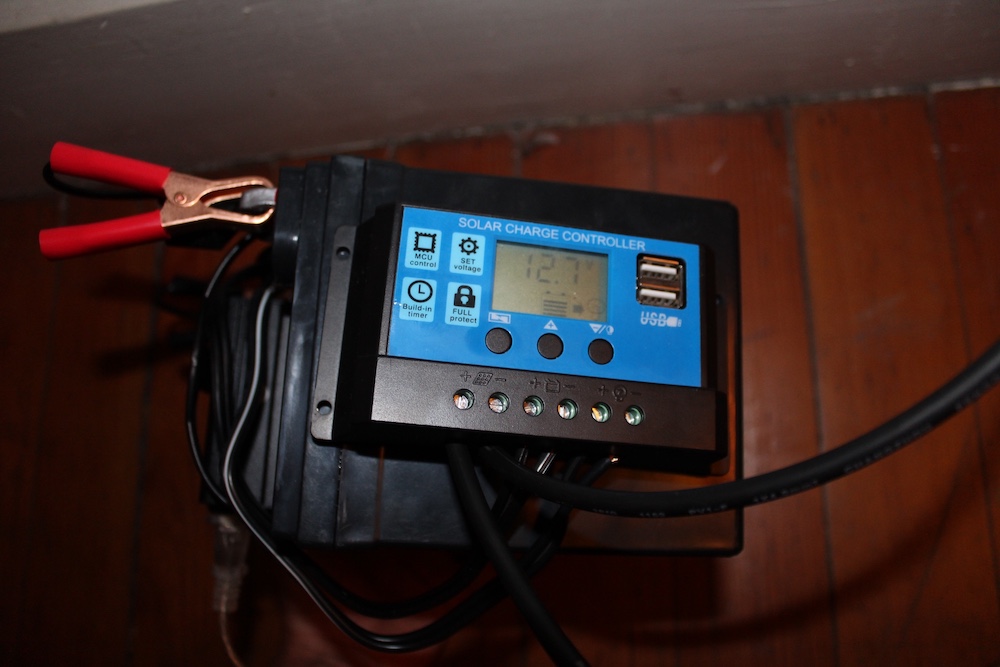
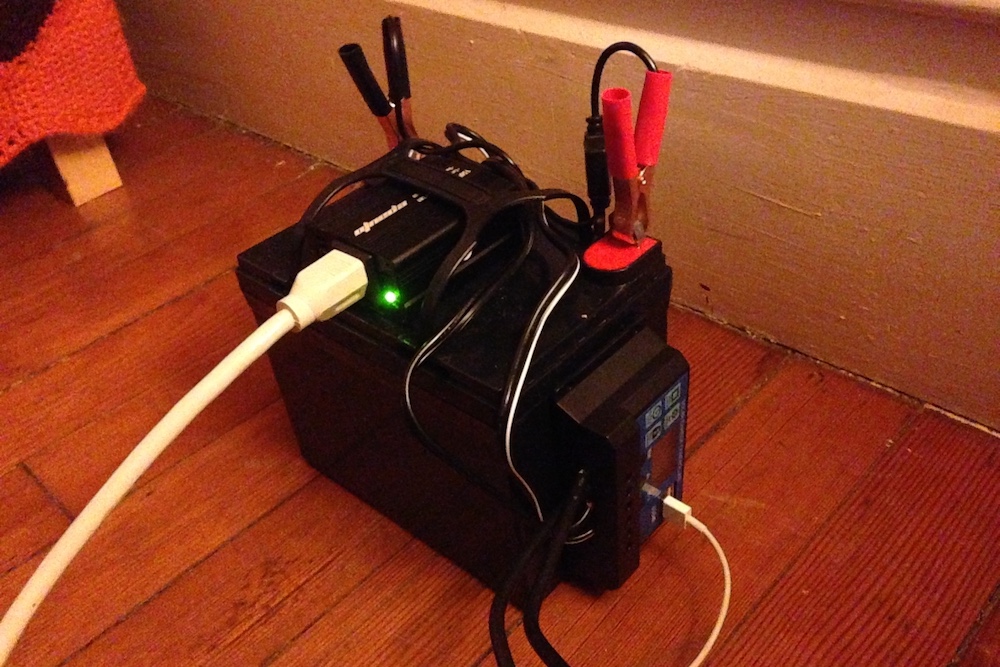
Step 3 Assemble the solar controller, inverter and battery into a tighter package. Re-clamp the wire from the panel to the solar controller and close the window. It should look as above. The charge begins!

In the evening, turn on the inverter. My lamp, computer, tablet & phone are all being powered simultaneously here on the day’s solar charge! Self sufficiency achieved?
One month of off-grid living in my room
In San Francisco we get 4.26 hours of usable sunshine a day (or 1156 hours a year) according to Google Sunroof. My battery holds 420Wh (12V x 35Ah), and should be filled once a day without any shading. Actual production is an average 350Wh/day on the rooftop with real-world shading and loss.
Daily Power Production:
Theoretical: 4.26 sun hours/d * 100W solar = 426Wh/day
Actual: 350Wh/day

Daily Power Needs:
54Wh Macbook Air 13-Inch (one charge a day)
8Wh iPhone battery (one charge a day)
300Wh Space Heater (150W x 2h – our SF house has no heating)
___________

Total: 82Wh energy need per day in room (up to 382Wh)
This should be easily met by the solar system. I turn the inverter on when I get home to use AC lights and charge the Macbook through the power brick, and turn it off before I go to bed to avoid energy drain. My phone’s USB (which is direct current) can charge all night straight through the solar controller itself (which has USB ports) and doesn’t require the inverter. My laptop is a DC device and could be charged straight off the 12V battery, but I found it easier to just charge it with the AC power brick through the inverter. More info on what you can run off the system in the follow-up article here
 |
 |
|---|---|
My traditional AC lamp is a non-optimized part of the system— I could get DC lights that run off USB to avoid inverting that energy, but have not done so thus far and prefer to just use the cute little thing. When I go to bed I’ve usually used around 30% of the energy anyway— I wish I could run a water heater, heating or fridge off this system to use the excess 270Wh of the daily energy production.
Learnings and Outlook
This project started with a simple idea: What if energy generation was a consumer electronic you could order off Amazon? I’ve learned that basic electrical knowledge and a little assembly bring us very close to this ideal: Self-contained renewable lighting and charging is achieved with a simple setup off Amazon.
 |
 |
|---|---|
Unless you live on an RV or a boat it doesn’t make financial sense yet (see epilogue #1). But if prices come down a little more (what a difference the last year made!) or manufacturing gets a bit more resource-efficient the scales could tip and this could be a green and fiscally sensible solution (see epilogue #2). And some time in the next decade this great little DIY system that can function as a back-up system today (see epilogue #3) could become a viable consumer electronic: a cheap personal power plant for urban renters.
Outlook
What if autonomous electric generation could be added room by room to a household (like window A/C units)? We could outfit all 7 rooms of my (shared) household for around $1400 with this system today. Because the kitchen and bathrooms have way higher energy usages (fridge, stove, water heater) than the other rooms, a more sophisticated system could mesh the batteries together (wirelessly?) to create a stronger system that sends power to the rooms that need it most. This system could also discharge the batteries systematically as the price of grid power changes and the sun moves around the house.
 |
 |
|---|---|
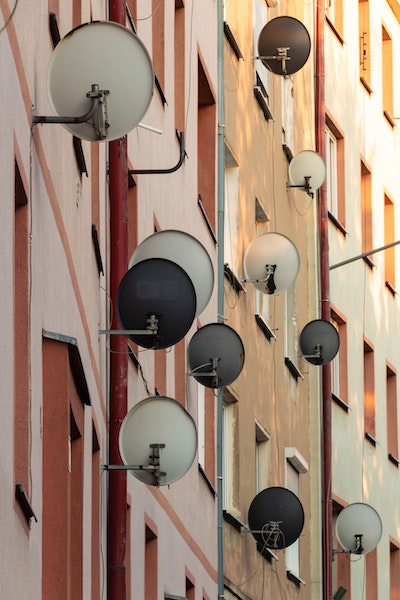
Solar as a modular consumer electronic — like air conditioning and satellite dishes? If we look to the car, the smartphone, the window A/C unit — these devices spread like wildfire across the globe because they were off-the-shelf products that required no configuration but great benefits. Identical appliances were churned out at an industrial scale for a global audience. They were “plug n play”. Plug n play solar has been around for a while, but has never taken off (probably because behind-the-meter power is still sketchy and poorly understood). The potential for plug n play solar is huge — it could mean cheap, zero-configuration solar energy spreading to consumers at the pace of the smartphone, the car or air-conditioning. This could be a cool Kickstarter project in the future… or a just fun DIY project today.
Financial Payback & Embodied Energy
How long until it saves me money? The reason this system is so simple is because it doesn’t tie in to your apartment’s behind-the-meter electrical grid. This means the system is clean, but it also doesn’t feed into electrical heavyweights like your water heater, refrigerator and washer/dryer. It does charge anything you plug into it though. So can the system save me money? Back of the envelope:
Financial payback period for 100W system
System cost : $201 on Amazon in 2020
Yearly energy creation: 365d * 4.26hsun/d * 100W = 155’490Wh/y
Yearly value creation: 155kWh/y * 15.34c/kWh = $24/y energy created
100W system payback period: $201 / $24 = 8 years until payback
The financial payback of the system is 8 years including battery, which is in line with many rooftop systems but doesn’t include servicing. This could be reduced to 6.5 years by adding a second 100W solar panel:
Payback period for 200W system
200W System cost: roughly $272 on Amazon at time of writing
Yearly energy creation: 365d * 4.26hsun/d * 100W = 310’980Wh/y
Yearly value creation: 311kWh/y * 15.34c/kWh = $48/y energy created
200W system payback period: $272 / $48 = 5.6 years until payback
Note however that after 8 years of daily use the lead-acid deep discharge battery will be spent, which I’m not taking into account here. Either way you cut it, this is not a money saving machine. Energy prices are just too low.
How green is it?
Does it have an impact on my CO2 footprint? Back of the envelope:
Production footprint PV multicristalline:
4200kWhee/kW [1] * 0.1kW = 420kWh embodied energy

Production footprint lead-acid battery:
1153kWhee/kWh [2] * 0.2kWh = 230kWh embodied energy

Total Footprint: 650kWh

Annual energy production system: 155kWh/y
Payback period: 650kWh / 155kWh/y = 4+ year footprint payback
Source Solar Source Lithium Batteries
An eventual product would use Lithium-Ion batteries once they come down in price, which have a way better energy footprint. Lead-acid batteries are used for now because they’re cheap. So no, we’re not saving any CO2 emissions here until after 4 years — not a green machine.
Energy independence and resilience
In case of brownouts or blackouts, this would be a helpful way of wirelessly charging communications devices without the grid. A 200W system could even keep a small 60W, 12V refrigerator cool enough to conserve food (14hours of operation/day, cooling down 32 degrees below ambient temp). If energy prices increase (double? triple?) due to unforeseen events in the future, the financial perspective may even make sense with payback periods decreasing to four or even 2.8 years for the 100W system or for the 200W system to 3 years or 2 years, respectively. At under 2 years payback period, we’d be in similar consumer territory to 2-year phone contracts. Let’s hope components continue to get cheaper! (or energy prices increase — but I’d rather not hope for that)
Tech Specs
Polychristalline Solar Panel
Size: 39.8 x 1.2 x 26.6 inches
Weight: 19.6 pounds
Voltage: 12V DC
Max power rating: 100W
Max amperage: 8.3A


Inverter
Max power rating: 150W<br> (turns off if you use more than this, but a 300W version is $6 more)
Voltage: 12V DC in, 110V AC out
Only DC 12V, NOT for DC 24V
USB Output: 5V/1+2.1A (5W and 10.5W respectively)

Solar controller
Voltage: 12V/24V
Ports: 2x USB, 1x DC in, 1x DC out
Charge Current: 20A
Discharge Current: 20A
Max in: 20A * 12V = 240W
Max out: 20A * 12V = 240W
USB Output: 5V/3A (15W) each
Type: PWM
Weight: 0.25 pounds
Size: 5.9 x 3 x 1.4in
Will upgrade to a USB-C version when available

Lithium Iron Phosphate Battery (Deep Cycle) (replaces original Marine lead-acid battery with more capacity but less usable capacity)
Voltage: 12V DC
Storage Capacity: 0.2Kwh, 16Ah
Size: 6.5 x 7.7 x 5.1 in
Weight: 25 pounds


Cables (aka "Tender" or "B.O.M.")
Alligator Clips (for connecting the battery to the solar controller)
20Ft Extension Cable